Shop Running Board and Rock Sliders - Click HERE
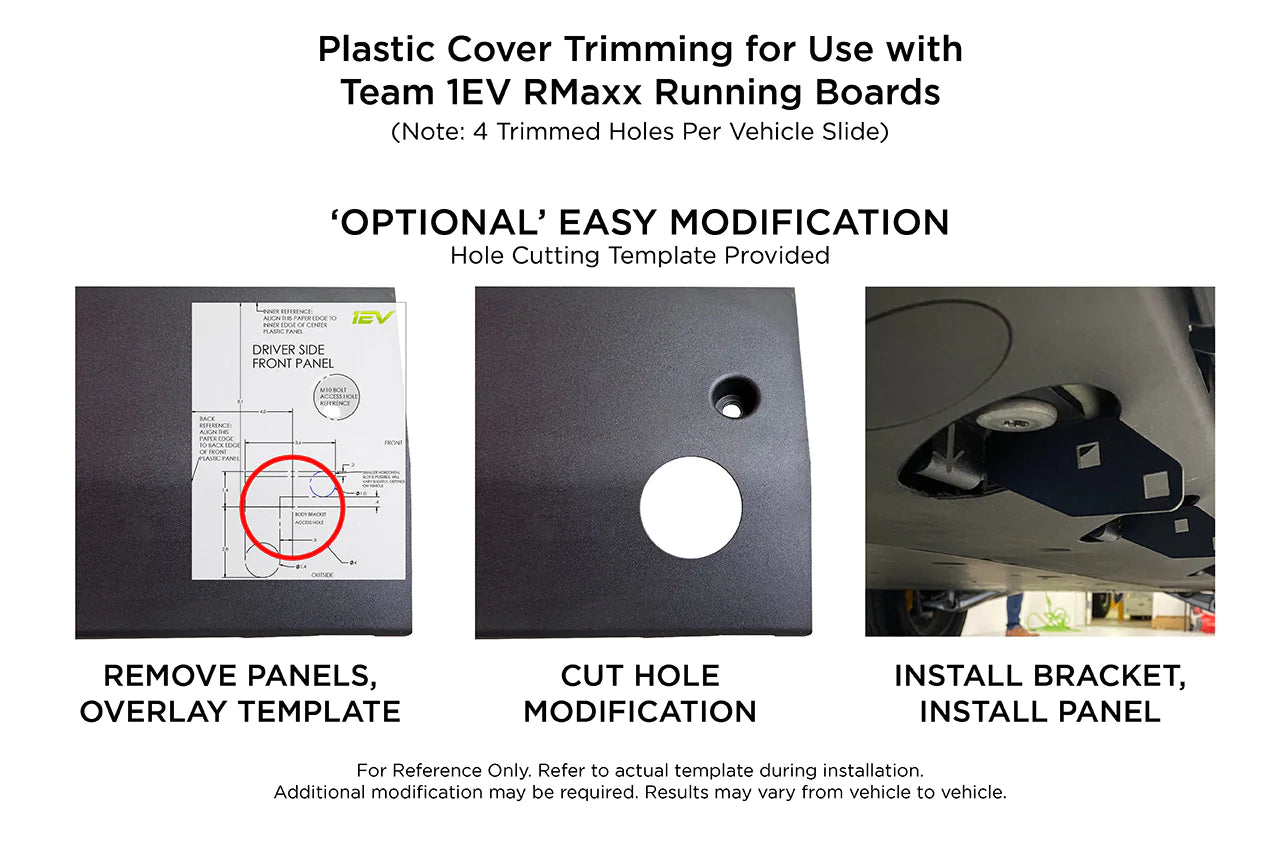
First, we highly recommend watching our detailed installation video, which will walk through each step in detail. Watch the DIY how-to video HERE. The modification entails cutting a clearance hole (or slot) for our brackets to pass through.
In this discussion, we will explain how to use Team 1EV Underbody Plastic Panel Trim Templates. These templates are used for installing Rivian R1T pickup truck / R1S SUV RMAXX Running Board Brackets. For this installation, we used a Launch Edition 2023 Rivian R1T. You can download cutting templates here:
Before you start, make sure you park your Rivian on level and stable ground. Next, clean the underside of the truck by washing and wiping down the underside plastic panels. These plastic panels run the length between front and rear wheels, underneath the vehicle on the outside edges.
First, we will activate off-road mode. This mode will lift the vehicle and increase ground clearance. As a result, it will be easier to access the underside of the vehicle.
Print the Team 1EV trim templates and confirm they are 1:1 scale by measuring the 4" confirmation line on the printed template. Starting with the driver side front panel, place your diagram under the truck and match up the template's back and inside edges with the corresponding panel edges. You will notice a circle on the diagram for the 10mm bolt that holds the panel bolt into the chassis.
Double check the template edges and panel access bolt reference markings align with the panel edges on the truck in order to get your template location perfect! Using a nail, screw, or anything sharp enough, mark the center of the pilot hole, showing where to then center the holesaw to cut the access hole on the panel.
If you can't print the template, don't worry! You can manually measure from the panel edges using the dimensions of 8.1 inches (from inner edge) and 4 inches (from rear edge) with a measuring tape. Start by measuring 4 inches from the rear edge of the panel, then 8.1 inches from the inner edge of the panel. Mark the center of the pilot hole, showing where to then center the holesaw to cut the access hole on the panel.
To keep track of your measurements, you can also place masking tape strips on the panel and mark the measured points.
Remember, when prepping to use the holesaw, the drill tip should not extend more than ¼ inch beyond the edge of the saw. Note, you won't be at risk to drill into the battery pack

line up the holesaw pilot drill with the spot marked on the plastic using the template. Drill slowly and carefully into plastic, as it cuts easily. Don't push the saw too hard into the plastic. Don't worry too much about perfection because you can also clean up the cuts with a utility blade.

Once the cut is complete, you will then carefully remove the exposed body bolt with the included TP55 bit. Maneuver the bracket up into the plastic panel access hole, and then screw the body bolt back in, securing the bracket to the Rivian frame. Then, again taking the TP55 you will torque the body bolt back to the factory specifications (80 ft-lbs).
Repeat the process for each of the remaining bracket bolts, using the templates for each subsequent location. Once you have installed all of the included brackets, you are ready to move on to installing the running boards! Soon enough you'll have the best Running Boards from Team 1EV, the leader of electric vehicle upgrades, installed and ready for helping passengers in!
Link to full step-by-step instructions - click HERE
Link to customer photo gallery - click HERE

