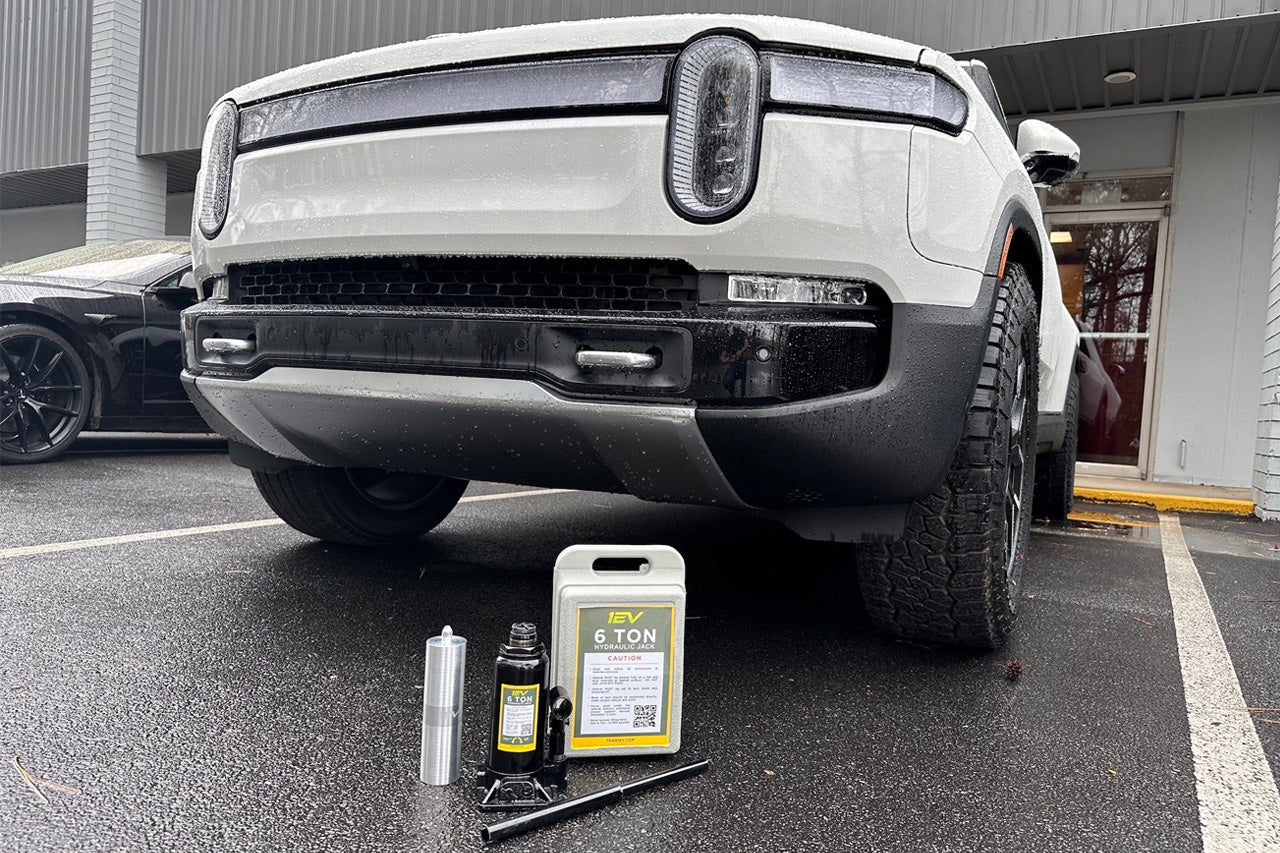

Usage Instructions & Storage Directions for Rivian R1T / R1S Bottle Jack Kit by Team 1EV
Click HERE for Team 1EV Bottle Jack Kit Product Page
Usage Instructions:
1 - Park Rivian R1T / R1S on stable and level 'concrete' surface.
2 - Set air suspension height:
On the center screen, under vehicle settings change vehicle height to 'Off-Road' mode and select proper vehicle height as follows:
- For FLAT tires, select 'Highest' ride height as shown in the image below:

- For inflated tires (not flat), select 'High' ride height.

The ride height selector will flash gray / black while the vehicle suspension raises. Allow the vehicle to completely raise to height, which may take several minutes. The ride height selector will go solid black as shown above, when the vehicle is finished raising.
Next, go to settings (tap the settings 'Gear' on the lower navigation. Navigate to 'Vehicle', then 'Service', then activate 'Tire Change' Mode, as shown:
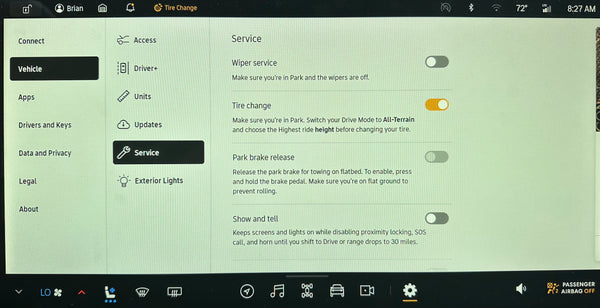
This will ensure the air suspension does not change height during the jacking process.
3 - At the desired jacking point (one of the four corners), find the factory jack point on the underside of the Rivian. This will be a small (2.5" diameter) plastic cap underneath the Rivian either behind the front wheels or in front of the rear wheels. The cap can be popped open by pressing on one side of the cap and pulling down on the opposite side of the cap. The caps are connected to the Rivian with a small plastic strap and will just hang from the vehicle when opened.
4 - Place the bottle jack on the ground and extend the jack screw top of the jack by 'unscrewing / loosening' the screw top pad. Simple twist the top counter-clockwise until the screw extends out a minimum 1.5" from the jack body. Depending on condition variations and vehicle air suspension variations, it may be necessary to fully extend the jack screw (extend to max height) - but in any case, the Jack Screw should never be less than 1.5" extended from the hydraulic shaft.

5 - Optional: Slide one included o-ring over the jack screw shaft and position it approximately 1" below the top of the jack screw top pad. The o-ring is not critical and only holds the Jack Extender from wiggling around before a load is placed on the Jack. The o-ring usage is optional. We recommend wiping the o-ring with WD-40 or similar lubricant to enable the Jack Extender to slide over it with ease.
6 - Slide the 1EV aluminum Jack Extender over the jack screw shaft and over the o-ring (if o-ring used). This Bottle Jack and Jack Extender assembly is ready for use.
7 - Slide the Bottle Jack assembly under the Rivian and position it so the tip of the Jack Extender aligns with the Jack Puck hole inside the Rivian jack point exposed in step 3. If the Bottle Jack assembly sits flat under the Rivian and lines up directly under the Rivian jack point, proceed to step 8. If the Bottle Jack assembly is too tall to sit flat under the Rivian due to an extremely flat tire or air suspension which is not raising entirely, you can use the onboard Rivian air compressor to fill the tire with air (and raise the Rivian) or you can cycle the suspension by toggling between 'High' and 'Highest' ride height (turn off Tire Change mode to cycle suspension).
8 - Once the Bottle Jack assembly is sitting flat and positioned under the Rivian jack point, tighten the Bottle Jack valve screw at the base of the jack. Use the handle with t-slot end to tighten the valve screw by twisting the screw clockwise, tightly.
9 - With the jack valve screw tight, install the larger diameter handle into the pump sleeve on the jack. Rotate the Bottle Jack base so the pump handle is perpendicular to the vehicle side. Start pumping the jack up by moving the handle up and down. As the jack top starts moving up, it is important to carefully align it with the Rivian jack point. The pointed tip of the Jack Extender must fit directly in the Rivian jack point hole. Take your time and carefully and slowly jack and align until the Jack Extender is seated in the Rivian jack point.
10 - You can assemble the smaller diameter jack handle into the larger diameter jack handle to create a longer handle which makes jacking easier.
11 - Continue to jack the vehicle up until desired height is reached. Note, if the jack is fully extended and vehicle is not reaching adequate height to remove the tire, two remedies are offered:
12 - Never go under the vehicle when it is jacked up, unless using secondary proper jack stands (not included).
13 - To lower the jack, simply loosen the jack valve screw using the jack handle and twisting the screw slowly in the counter-clockwise direction.
14 - Once the vehicle has lowered the Jack Extender may need to be pulled down by hand to get it fully seated at the lowest position.
15 - Once finished and bottle jack is removed from under the vehicle and all is clear under the vehicle, turn off 'Tire Change' mode. Next, adjust vehicle ride height to desired setting.
Storing the Bottle Jack
The recommended position is to store the Bottle Jack in the case, with the case positioned in the upright position (handle up), not laying down. This will help prevent hydraulic fluid from seeping. Note, it is normal for some hydraulic fluid to seep from the jack. Hydraulic fluid can be wiped up and discarded as needed.